
Our team of Starlink installers has recently completed a Starlink installation in Buena Vista, CO, for a family preparing to move into their new home. The property is a spacious 4,000-square-foot, two-story single-family residence. It is surrounded by tall pine trees and situated in an area with limited traditional internet service providers (ISPs). The installation was completed efficiently, and the customer enjoys high-speed and reliable internet.

To schedule an appointment or learn more about Starlink installation, please call us at 1-844-799-0258. Alternatively, fill out our contact us form to get a quote or to send us a note.
Our Starlink Installation Subject Matter Experts (SMEs) recently received a service request for a residential Starlink installation in Buena Vista CO. As part of our standard installation process, we conducted an Initial Offsite Assessment. This was to gather customer requirements and evaluate the technical feasibility of the location.
This assessment involved a detailed analysis of satellite imagery of the property and reviewing on-site photos provided by the client. We also determined the roof type and possible obstructions that could impact the installation.
Result of Initial Offsite Assessment:
🔹Property type: Approximately 4000 sqft, two-story single-family home
🔹Roof Type: Asphalt Shingle roof
🔹Starlink Equipment: Starlink Standard Kit
🔹Mount: Ridgeline and Pipe Adapter mount
🔹Additonal Equipment/Materials:
🔹1 Gen3 WiFi Mesh Router for entire home coverage
🔹45M Starlink Standard Cable
🔹Cable Routing Kit
We confirmed that the property is feasible for a Starlink installation. We selected the equipment and materials to meet the specific needs of the large two-level home and its mountainous surroundings. Our professional Starlink installers in Buena Vista CO were scheduled for the installation.
Our Starlink installers arrived at the site to perform the following scope of work:
🔹Dish / Antenna Installation: Install the Starlink Standard dish using the ridgeline and pipe adapter mount
🔹Cable Routing: Run the Starlink cable from the dish to the indoor Gen3 routers.
🔹The cable pathway will depend on the finalized position of the main router and Starlink Dish.
🔹If the existing DTV Cable Dish pathway can be used, the technician will guide the pathway for the Starlink cable.
🔹If the current DTV pathway is not sufficient, the technician will recommend creating a new, dedicated cable path specifically for the Starlink cable.
🔹Router Setup: Activate and configure the two routers.
🔹Starlink App: Guide the customer on how to use the Starlink App account.
🔹Starlink Test: Test Starlink alignment and connectivity performance
🔹Installation Photos: Document the installations with photos and close-out notes.
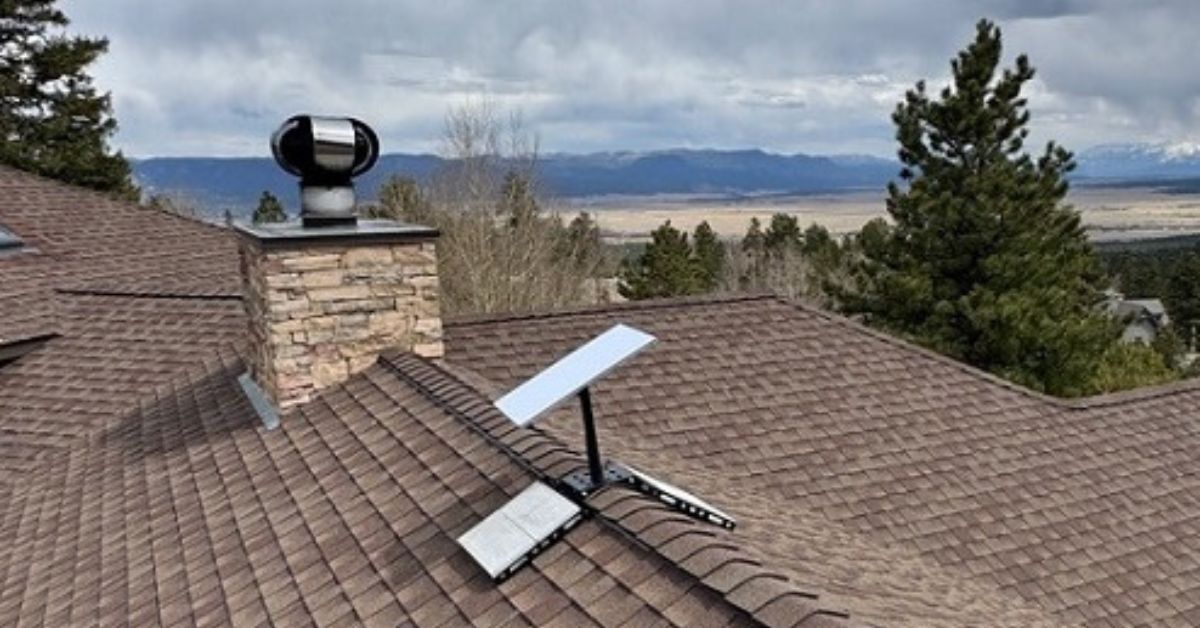
The Starlink installation process began with an obstruction test using the Starlink app to determine the best location for satellite visibility. By scanning the sky from various points on the roof, our technicians identified the optimal mounting position. There was minimal interference from nearby tall pine trees and surrounding terrain.

Once the clear line of sight was confirmed, the ridgeline mount with a pipe adapter was securely installed at the highest suitable point on the asphalt shingle roof. A 45-meter Starlink cable was routed into the home using a cable routing kit, providing a clean and weather-resistant connection.


Then, the Starlink cable was connected to the router. Connect it to the power supply and activated. Configured the SSID and password with the customer’s Starlink account.


In addition, we provided a walkthrough on the key features of the Starlink App. This included resetting their WiFi password, running speed tests, troubleshooting common connectivity issues and others.
Our Starlink installers conducted the Starlink alignment test using the Starlink app to confirm that the dish had a clear, unobstructed view of the sky. This is an essential factor for ensuring a stable connection with minimal disruptions. Using the Starlink speed test, the connectivity performance can be determined.

The speed test results from your Starlink connection are quite solid. This is particularly impressive for a residential setup in a mountainous or rural location.
🔹Download speed (159 Mbps) is well above the average for Starlink’s residential users. It is ideal for high-bandwidth activities like 4K streaming, large file downloads, video conferencing, and multiple simultaneous users.
🔹Upload speed (16 Mbps) is sufficient for tasks like Zoom meetings, cloud backups, and online gaming.
🔹Latency of 17 ms is excellent for a satellite connection. It indicates low delay and good performance for real-time applications such as VoIP, gaming, and video conferencing.
It is important to note that Starlink may take up to 12 hours to synchronize fully. It scans the sky and optimizes satellite connections during this time. Temporary speed fluctuations or brief dropouts can occur. However, once stabilized, it ensures a reliable high-speed connection.
The successful Starlink installation Buena Vista, CO, demonstrates the effectiveness of careful pre-installation assessment and expert execution. With a ridgeline mount providing optimal satellite visibility and the integration of a Gen 3 Mesh Router, connectivity could be extended throughout the 4,000 sq. ft. two-story home. The system achieved excellent performance metrics.
The final speed test recorded a download speed of 159 Mbps, upload speed of 16 Mbps, and latency of 17 ms. This confirmed a reliable high-speed internet connection with minimal obstructions and optimal alignment. This installation ensures the moving-in family enjoys seamless internet access for work, streaming, and communication. It proves once again that Starlink is a dependable solution for rural and mountainous areas.
Want Starlink for your Home?
Contact us at 1-844-799-0258
Our team of Starlink Installation SMEs is ready to assist you.
We offer professional Starlink installations in areas near Buena Vista, Colorado:

Thank you for reading our Starlink installation articles.